In this blog post, we’ll guide you through the steps to easily add or remove a watermark using Soda PDF, ensuring your documents look professional and meet your specific needs. Let’s dive in and discover how you can take control of your document’s appearance with Soda PDF!
Adding a Watermark
Step 1 – Open the Edit module
- Open the Edit Module.
- Click on the Watermark feature.

A window will open providing you with a series of options to configure your watermark.
On the left-hand side of the window you will see a preview. This will show you how your Watermark will look on each page of your document.
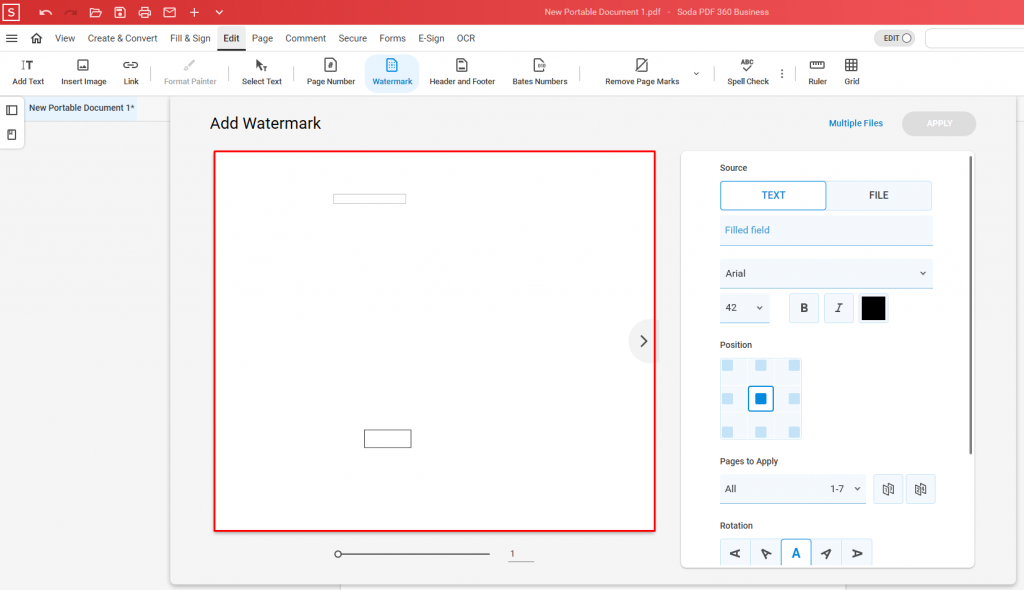
- To add a watermark to multiple documents, click Multiple Files to use the Batch Watermark feature.
Step 2 – Configure the settings
You can choose to create a text-based watermark.
- Select Text as Source.
- Enter your text into the box.
- Choose the Font, Font Size, and Color.
- You can also Bold or Italic your text.
You can upload any file to use as a watermark by choosing File
- Choose File as Source.
- Click on the Browse button.
- A Browse Window will open. Choose the image from your computer you would like to use.
- Adjust the Absolute Scale of the image.
- The position will let you choose between 9 placement spots on your page.
- In the Pages to Apply section, you can determine which pages you want the watermark to appear on.
- In Rotation, you can select the different angles of the A to rotate your watermark.
- Opacity allows you to change the transparency level of your watermark. At 100 it will appear as any other document element. At 0 it will be invisible.
- Location allows you to choose to have the watermark appear above all document elements or behind them.
- You can cycle between the different pages of your document to preview what it will look like on any page.
- Click MAKE DEFAULT to use these settings moving forward. You can reset the default at any time.
Step 3 – Apply the changes
- When you are ready to add your watermark, click APPLY.
- The watermarks will be added to your document.
Removing a Watermark
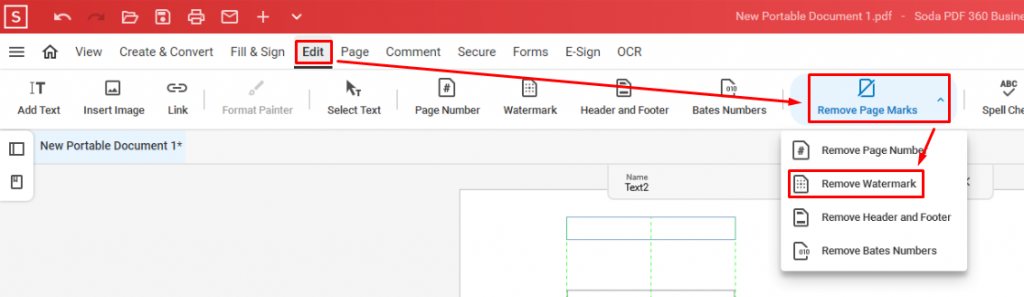
Step 1 – Open the Edit module
- Open the Edit Module.
- Click on the Remove Page Marks feature.
- Choose Remove Watermark.
Step 2 – Remove the Watermark
- Select the pages to remove the watermarks from.
- Click on the Remove button.
- The watermarks will be removed.